
Cornell Notes Layout: How the Columns Work and How to Print Them Correctly
The Cornell method depends on three specific regions of the page working together. Learn how the cue column, notes area, and summary band are sized, how margins affect the layout, and how to print sheets at accurate scale.
Tip: Treat your first printed Cornell template as a draft: use it for one real class, then adjust cue column width and summary rows based on how much space you actually needed before printing a larger batch.
How the Cornell notes columns work
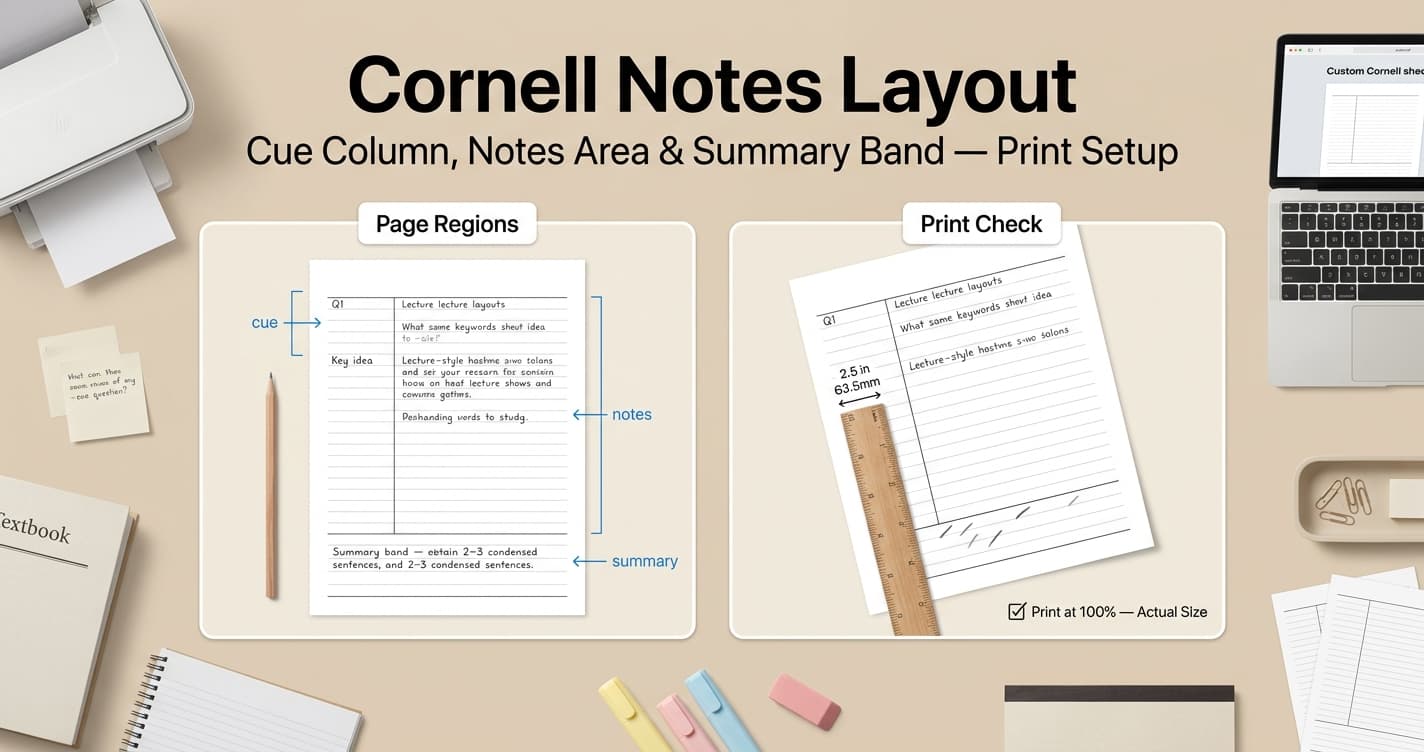
The Cornell method, developed at Cornell University in the 1950s, divides a page into three regions: a narrow cue column on the left, a wider notes column on the right, and a horizontal summary band spanning the full page width at the bottom.
During class or reading, notes go in the main notes column as they normally would. The cue column is left blank at first and filled in afterward with keywords or questions that correspond to each block of notes beside it. The summary band at the bottom is completed last, condensing the page into a few sentences.
The classic proportions place the cue column near 2.5 inches (63.5mm) wide — roughly one-third of the writable page once margins are accounted for — with the notes column filling most of the remaining space, and the summary band as a fixed strip across the bottom of the page rather than a column.
Sizing the cue column and summary rows
A commonly used cue column width is about 63.5mm (2.5 inches) on a Letter or A4 page. That matches the default in most Cornell template generators and stays close to the traditional visual balance of a narrower cue strip beside a wide notes area. Widen it if you write longer cue questions; narrow it if you prefer short keyword-style cues and want more room for notes.
The summary band is usually sized by row count rather than a fixed height, since the number of ruled lines needed depends on your line spacing. A default of about 7 summary rows (a practical range is roughly 6–8) is enough to force a genuinely condensed recap without leaving so much blank space that students pad it with filler.
If you're generating your own template, start from the 63.5mm cue-column default and adjust after a session or two of real use. STEM subjects with short cue terms often work well with a narrower cue column and more summary rows for formula recap; essay-heavy subjects often benefit from a wider cue column for longer prompt-style questions.
Margins and page setup for Cornell notes
A page margin of about 10mm on all sides is a reasonable default for a printed Cornell notes template, leaving enough printable area for the three regions without pushing content into a printer's unprintable edge.
If you plan to hole-punch or ring-bind your printed pages, increase the left margin beyond the default, since the cue column sits closest to the binding edge and needs extra clearance so punched holes don't land on top of cue text.
Paper size affects the layout's proportions even at the same margin and cue-column settings, since A4 (210×297mm, or 8.27×11.69 inches) is slightly narrower and taller than US Letter (8.5×11 inches, or 216×279mm). A cue column set as a fixed millimeter value takes up a slightly larger share of an A4 page than the same value on Letter, so revisit the cue width if you switch paper sizes and want to preserve the same visual ratio.
Using the layout during and after class
1. During class: write notes in the main column as usual, leaving the cue column blank. Don't try to fill in cues in real time; it interrupts the flow of capturing information.
2. Within 24 hours: review your notes and write cue questions or keywords in the cue column that correspond to each section of notes beside them. Doing this soon after class keeps the material fresh enough to write accurate, specific cues.
3. For review: cover the notes column, read only the cue column, and try to recite the corresponding notes from memory. Uncover the notes column to check yourself, then repeat for sections you missed.
4. Summarize: once the cue column and notes are complete, write a short summary in the bottom band, condensing the page into a few sentences that capture the main takeaway for later, faster review.
Printing Cornell notes at Actual Size
Because the cue column, notes column, and summary band are all sized in relation to each other, scaling the page even slightly during printing shifts every region by the same percentage. Always select Actual Size or set Custom Scale to 100% in the print dialog, and disable Fit to Page or Shrink to Fit.
Print a single test page before running a full set, and measure the cue column width with a ruler against the value you set in the generator (for example, about 63.5mm / 2.5 inches at the classic default). If it's off by more than a millimeter or two, check the print dialog's scale setting before printing additional pages.
Generate a custom Cornell notes template
Set cue column width, summary rows, line spacing, and margins, then export a print-ready PDF, PNG, or SVG.
Open Cornell Notes Tool