
Cross-Stitch Grid Paper: How to Match Your Chart to Aida Count and Fabric
Cross-stitch grid paper is only accurate if its cells match your fabric. Learn how Aida count determines cell size, how to calculate finished design dimensions, and how to read the guidelines, numbering, and a color key on a professional pattern chart.
Tip: Always print a single test page and measure ten squares with a ruler before printing a full chart. If ten squares of 14-count Aida grid do not measure exactly 10/14 of an inch (about 1.81 cm), your printer is scaling the page and the count will be wrong.
Why Cross-Stitch Grid Paper Has to Match the Fabric
Counted cross-stitch on Aida cloth is worked over a fixed number of stitchable squares per inch, so every stitch corresponds to a real, fixed distance on the fabric. Cross-stitch grid paper drawn as a generic square grid can still look correct on screen or on paper, yet stitch up at the wrong size, because the cell size and the fabric's Aida count were never actually connected to each other.
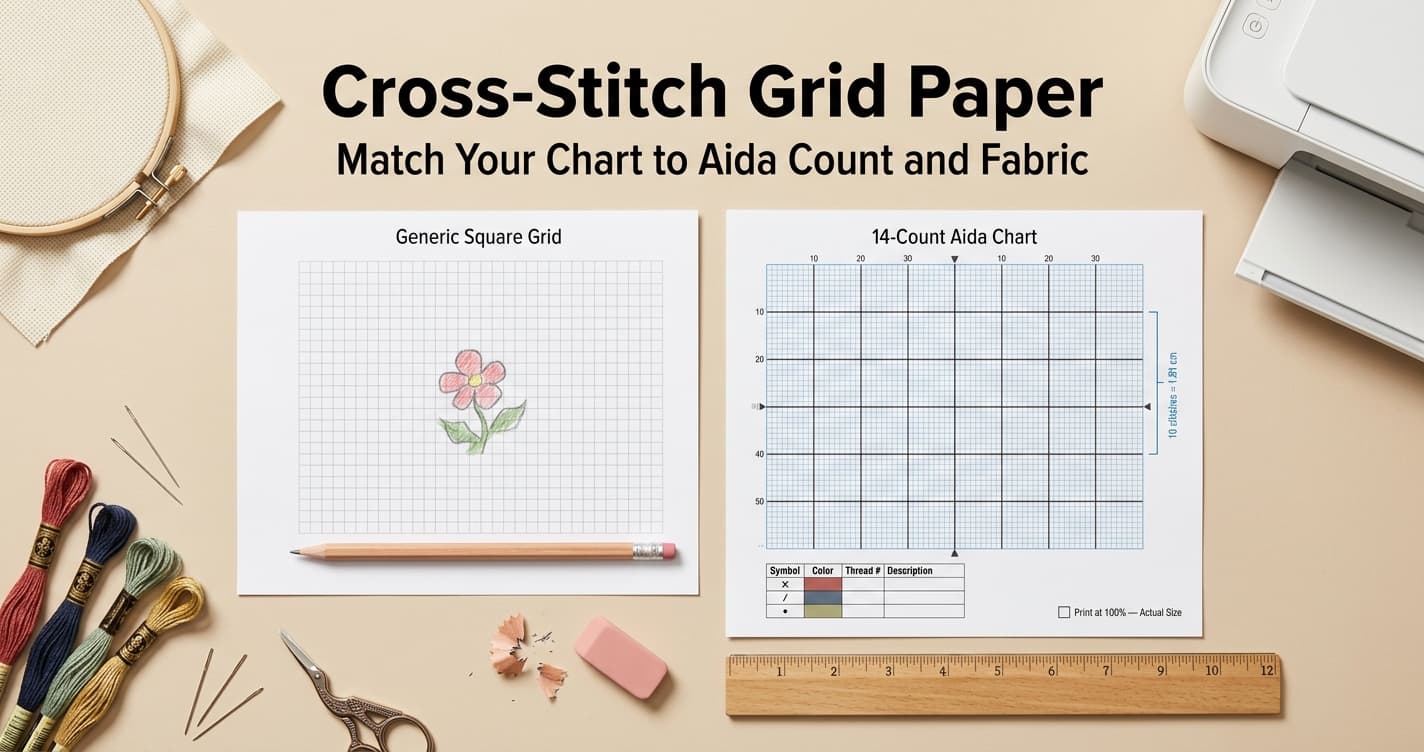
Dedicated cross-stitch graph paper solves this at the source: instead of drawing a square of an arbitrary size, a generator builds the grid from your fabric's count, so each printed cell represents exactly one stitch at true scale. Choose 11, 14, 16, or 18-count Aida, or switch the unit system to millimeters or inches and set a custom cell size for specialty fabric.
Understanding Aida Count: 11, 14, 16, and 18
Aida count is the number of stitchable squares per inch of Aida cloth, and it is the single most important number in planning a chart. A higher count packs more stitches into the same physical space, which means finer detail but a smaller finished design. A lower count produces larger, chunkier stitches that are easier to see and faster to work. In the generator, each count maps to a fixed cell size so the printed square matches one hole on that fabric.
1. 11-count: 11 squares per inch, with 2.31 mm cells. Large, easy to see, and a common starting point for children, beginners, and bold motifs.
2. 14-count: 14 squares per inch, with 1.81 mm cells. The default and most widely used size for charted designs, offering a practical balance between detail and stitching speed.
3. 16-count: 16 squares per inch, with 1.59 mm cells. Noticeably finer than 14-count, suited to designs with more detail packed into a smaller finished piece.
4. 18-count: 18 squares per inch, with 1.41 mm cells. Fine work, often chosen for miniatures, ornaments, or designs meant to be framed at a small size.
If your fabric is not one of those four Aida presets, switch the unit system from count to millimeters or inches and set Grid Cell Size directly. Custom cells can be 1–5 mm, or 0.04–0.2 inches, which covers most evenweave and linen working sizes without forcing the chart onto the wrong Aida preset.
Calculating Finished Design Size From Stitch Count
Because each stitch occupies a fixed, known fraction of an inch, the finished size of any design can be calculated before a single stitch is worked. Divide the stitch count of the design, in each direction, by the fabric's count per inch.
For example, a design that is 100 stitches wide and 140 stitches tall, worked on 14-count Aida, finishes at 100 divided by 14, or approximately 7.1 inches wide, by 140 divided by 14, or exactly 10 inches tall. The same design on 11-count Aida would finish larger, at roughly 9.1 by 12.7 inches, while on 18-count it would shrink to roughly 5.6 by 7.8 inches.
This calculation matters well before printing. It determines whether a design will fit inside a chosen hoop or frame, how much fabric to buy with a margin for finishing, and whether a particular count will make small details legible enough to stitch accurately. If the finished size is too small for the motif, drop to a lower count rather than enlarging a generic square grid, which would break the one-cell-one-stitch relationship.
Reading the Grid: Guidelines, Numbering, and Center Marks
Commercial cross-stitch charts share a small set of conventions that make a busy grid readable, and a well-built printable chart should follow the same conventions rather than presenting a plain, uniform grid. An accented graph-paper sheet with a highlight every 10 cells can help with counting, but it will not size cells to Aida count or include a color key and center markers.
A bold guideline every 10 stitches breaks the grid into countable blocks, so a stitcher can jump from block to block instead of counting single squares across the whole width of a design. In the generator these are the Highlight Lines: slightly heavier and darker than the normal grid, with independent weight and color. Optional stitch numbering along the edges reinforces the same idea, giving an exact coordinate to return to after a break without recounting from a corner.
Center markers, shown as small arrows at the midpoint of the top and side edges, support the traditional method of starting a design from the center of the fabric and working outward. Fold the fabric into quarters to find the center, then match that fold to the arrows on the chart. Starting at the center keeps the finished design balanced within the fabric regardless of the exact piece size cut for the project, which matters most on fabric that has already been trimmed close to the intended finished dimensions. Both numbering and center markers can be toggled off if you need a quieter working sheet.
Building a Readable Color Key
A color key ties each symbol on the chart to a specific thread. The legend table uses four columns: Symbol, Color, Thread #, and Description. Fill in a DMC or Anchor code in the Thread # column and a short color name in Description. This table turns an abstract grid of symbols into an actionable shopping and stitching list. The generator can show or hide the legend and scale it from 2 to 20 rows, with 6 rows as the default starting point.
Legibility matters more than completeness once a design uses more than a dozen or so colors. Symbols that look distinct in full color can become nearly identical once printed in grayscale to save ink, so it is worth choosing a symbol set that still reads clearly without color, and reserving color fills for a version meant to be viewed on screen.
Reserve extra space in the bottom margin for the color key, rather than compressing it into a narrow strip. The page-margin control ranges from 5 to 60 mm, and the default layout already uses a deeper bottom margin than the other three sides so the legend sits below the grid instead of crowding the last row of stitches. A readable legend at the stitching table avoids constant zooming or squinting between the chart and the thread list.
Evenweave Fabric and Printing Your Chart Correctly
Evenweave and linen fabrics are usually described by thread count rather than Aida count, and they are frequently stitched over two threads rather than one for stability and a more even texture. Stitching over two threads effectively halves the working count, so 28-count linen worked over two threads produces stitches the same size as 14-count Aida, even though the fabric's printed count is higher. The same rule turns 32-count over two into 16-count, and 36-count over two into 18-count. A custom cell size, set directly in millimeters or inches, is the more reliable option for this kind of fabric rather than forcing it into one of the standard Aida presets.
Once the chart is built, printing settings determine whether the calculated sizing actually survives onto paper. Set the printer to 100 percent scale and disable any fit-to-page or shrink-to-fit option, since even a small automatic adjustment shifts the printed cell size away from the fabric's true count and undermines every measurement calculated earlier. Match the PDF page size to the paper in the tray — A4, A3, A5, Letter, or Legal, portrait or landscape — so the driver does not scale to a different sheet.
PDF export generally produces the sharpest, most precisely scaled printed lines, which matters most for fine counts like 16 or 18. PNG works well as a reference image inside tablet or phone charting apps, and the export is 300 DPI. SVG is the better choice when the chart needs further editing, such as adjusting the color key or extending the grid, after the initial export.
Design your cross-stitch chart
Match your grid to 11, 14, 16, or 18-count Aida, or set a custom size for evenweave, then add a color key and center markers before exporting.
Open Cross-Stitch Grid Paper Tool