
Knitting Graph Paper: How to Match Your Grid to Your Gauge
Standard square graph paper distorts every knitting chart you draw on it. Learn how stitch and row gauge determine the correct rectangular grid ratio, with worked examples for fingering, DK, worsted, and bulky yarn.
Tip: Measure your swatch after blocking, not before. Wool in particular can relax in height after a wash, which changes row gauge more than stitch gauge and shifts your ideal grid ratio.
Why Regular Graph Paper Distorts Knitting Charts
A knitted stitch is not a square. It is a small, slightly flattened loop, and when hundreds of them stack into rows and columns, the fabric they form is measurably wider per stitch than it is tall per row. Sketch a design on ordinary square graph paper and that mismatch carries straight into your knitting.
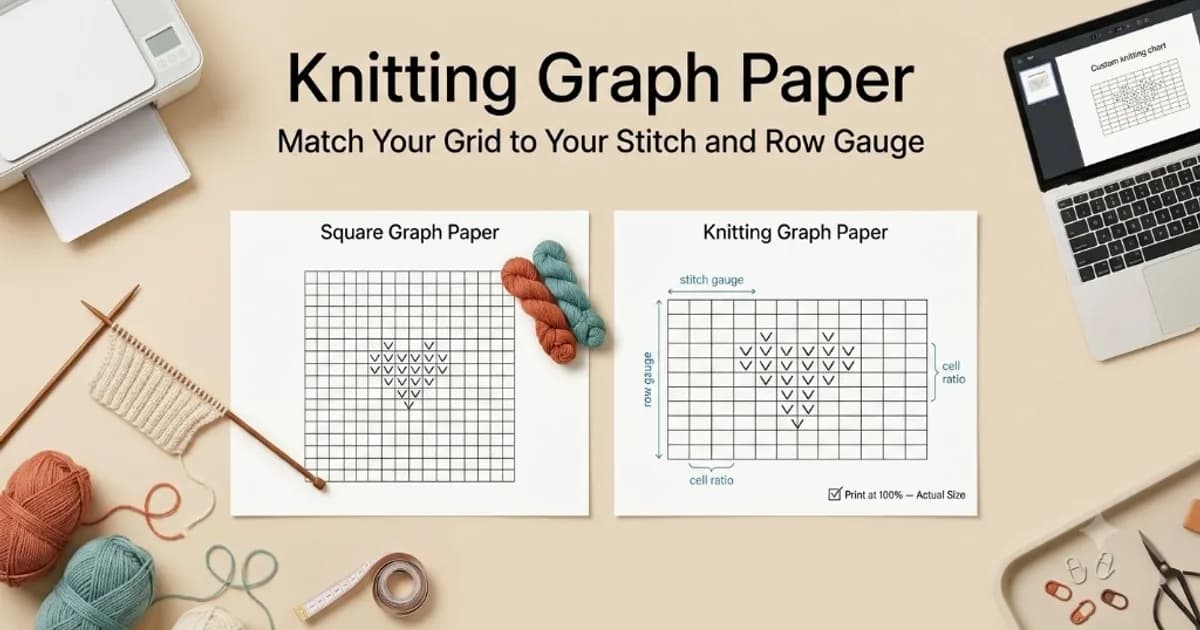
The effect is subtle on simple stripes but obvious on anything representational: circles knit as ovals, letters look squashed, and a heart motif that looked right on paper comes out short and wide on the needles. Dedicated knitting graph paper fixes this by using rectangular cells instead of squares, so what you see on the page previews what you will actually produce in fabric.
Understanding Stitch Gauge and Row Gauge
Gauge is normally measured over a 4 inch or 10 cm square of knit fabric. Stitch gauge counts how many stitches fit across that width; row gauge counts how many rows fit up that height. Both numbers come from the same swatch, but they almost never match.
In plain stockinette stitch, row gauge is typically higher than stitch gauge over the same distance. That means each individual row takes up less vertical space than each individual stitch takes up horizontal space, which is exactly why a stockinette stitch reads as a short, wide rectangle rather than a square.
Garter stitch behaves differently. Because every row is knit rather than alternating knit and purl, garter ridges compress vertically less than stockinette rows do, and garter stitch gauge often comes out close to square. This is one reason a chart that looks correct in one stitch pattern can look off in another, even at the same needle size and yarn weight.
Calculating Your Grid Ratio From a Swatch
Knit a swatch of at least 4 by 4 inches in your working yarn, needle size, and stitch pattern, then wash or block it the way you plan to finish the project. Blocking can shift row gauge noticeably, especially in wool, so measuring an unblocked swatch can send you into a project with the wrong ratio.
Once the swatch is dry and flat, count stitches across 4 inches for your stitch gauge, and rows up 4 inches for your row gauge. Divide each by 4 to get stitches per inch and rows per inch.
The grid ratio you need is: cell width to cell height equals row gauge to stitch gauge. For example, a swatch of 18 stitches and 24 rows per 4 inches gives 4.5 stitches per inch and 6 rows per inch, so the correct cell ratio is 6 to 4.5, which simplifies to roughly 4 to 3. Each grid cell should be about a third wider than it is tall to match that fabric.
If the math feels backwards, remember that a higher row count per inch means each row is physically thinner, and a lower stitch count per inch means each stitch is physically wider. The grid ratio simply mirrors that relationship.
Typical Ratios by Yarn Weight and Stitch Pattern
Every knitter's gauge is different, so a personal swatch always wins over a general chart. That said, stockinette stitch across common yarn weights tends to land in a fairly narrow band of width-to-height ratios, roughly between 1.2 to 1 and 1.5 to 1.
1. Fingering weight: around 28 stitches and 36 rows per 4 inches, which works out to a ratio near 1.3 to 1.
2. DK weight: around 22 stitches and 30 rows per 4 inches, close to a 1.4 to 1 ratio.
3. Worsted weight: around 18 stitches and 24 rows per 4 inches, close to a 1.3 to 1 ratio.
4. Bulky weight: around 13 stitches and 18 rows per 4 inches, closer to a 1.4 to 1 ratio.
These figures are starting points, not rules. Needle size, tension, fiber content, and whether the fabric is blocked can all shift the numbers, which is why the grid ratio should ultimately come from your own swatch rather than a table.
Charting Fair Isle, Intarsia, and Cables
Stranded colorwork, such as Fair Isle, tends to pull stitches wider than a plain stockinette swatch in the same yarn. Carrying an unused color across the back of the work adds horizontal tension, so a colorwork motif charted on a plain-stockinette grid can still come out slightly squat. Swatching the actual colorwork pattern, not just plain stockinette, gives a more reliable ratio for detailed motifs like portraits or lettering.
Intarsia uses separate bobbins of color for each block rather than stranding across the row, so its gauge is usually closer to plain stockinette than stranded colorwork is. Because intarsia charts are often read as solid color blocks rather than individual symbols, keeping grid lines light and using strong, distinct fill colors makes the block boundaries easier to follow while knitting.
Cables and lace rely less on color and more on precise stitch and row counts, so column tracking matters most. Highlighting every fourth or eighth column and row with a slightly heavier line helps you find your place after counting a long cable crossing or a multi-row lace repeat, without needing to recount from the edge of the chart each time.
Customizing and Printing Your Knitting Chart
1. Cell size: make cells large enough to write a symbol or apply a fill color clearly, especially for charts with four or more colors, but small enough that a full garment chart still fits a reasonable number of printed pages.
2. Line weight: keep the grid lines light gray so they stay visible without competing with colored pencil, marker, or printed color fills used to mark stitches.
3. Repeat markers: add a bolder line every 10 stitches and every 10 rows so you can count a wide chart at a glance instead of tracing one square at a time.
When you print, set the page scale to 100 percent and turn off any fit-to-page or shrink-to-fit option, since either one will quietly change your cell ratio and undo the gauge math. Print a single test page first, lay your swatch over the printed grid, and confirm that a stitch and a row on paper roughly match a stitch and a row on the fabric before printing a full chart.
Design your knitting chart grid
Pick a yarn gauge preset or set custom stitch dimensions from your swatch, then export a print-ready PDF, PNG, or SVG.
Open Knitting Graph Paper Tool